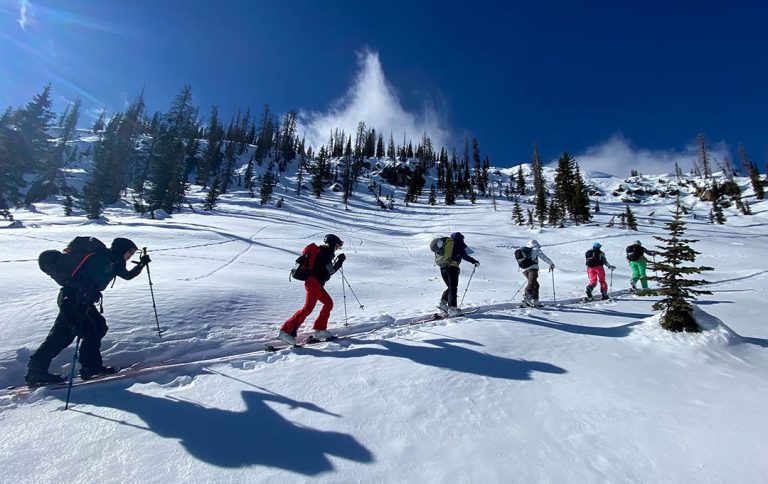
All Posts By

Melissa Fields

Melissa (O' Brien) Fields is a contributing writer for Salt Lake magazine. She is an accomplished freelance writer and editor with more than 20 years of experience.

Male + Female Carrying Christmas Tree_SLM ND24_pikselstock_AdobeStock 186703562

How to Cut Down your Own Christmas Tree in Utah

By Outdoors

In rural Northern Michigan where I grew Up, walking out into the “woods” to cut down a Christmas tree was a holiday tradition as essential as sipping eggnog and eating too many sugar cookies. Now, after calling Utah home for the past two decades, I’ve learned that cutting your Christmas tree is a tradition many families enjoy here, too. And it’s easy to see why. Fresh-cut trees are much less expensive and, if cared for properly, last much longer than pre-cut trees, which are typically harvested weeks before arriving on the Christmas tree lot. And, when you cut your own tree from a cluster, as the U.S. Department of Agriculture recommends, the trees left behind grow larger and more robust, creating a healthier forest.

All that said, walking around in the Utah “woods,” AKA backcountry, in search of the perfect Tannenbaum is not only more adventurous than the backyard tree-cutting sojourns of my youth but also requires more preparation and forethought. Here’s what you need to know before going on the hunt for the perfect yule-time tree.

Don’t forget the rope to tie the tree to your car.
Photos by Kristina Blokhin /AdobeStock,

No. 1:  Get a permit

Both the Uinta-Wasatch-Cache National Forest (USFS) and the Utah Bureau of Land Management (BLM) issue Christmas tree-cutting permits beginning in late October or early November. The specific districts where the USFS will issue Christmas tree-cutting will be announced in October. And it’s the early bird who gets the worm: last year, USFS Christmas tree-cutting permits sold out on recreation.gov within an hour of being released. Call the USFS regional office at (801) 999-2103 in mid-October to find out when online sales will go live this win-person permit sales. The BLM, which covers most of the rest of the state’s public lands, does not limit Christmas tree-cutting permits, which can be purchased at
forestproducts.blm.gov.

No. 2:  Know where, how and what kind of tree you can cut 

In past seasons, the USFS lands where Christmas tree cutting is allowed have been within the Heber-Kamas, Evanston-Mountain View, Logan, Ogden and Salt Lake Ranger Districts. As you might guess, all the canyons along the Wasatch Front—including the Cottonwoods, Millcreek, City Creek, etc.—are off-limits, as are all of the state’s designated Wilderness areas. The size and species of trees you can cut are specific as well—check your permit for details. In all cases, do not cut a tree that’s within 200 feet of a camping area or stream; make your cut on the trunk between six and eight inches above the ground, digging out snow from the base if necessary; never remove just the top of a tree; and scatter any extra branches that may have broken off during cutting around the stump. More info at fs.usda.gov.

No. 3:  Don’t forget to bring

A tape measure. Invariably, the tree that looks to be the perfect size when it’s out in the wild will turn out to be too tall for your living room. (Remember the dad in A Christmas Story?) Measure the space where you plan to place the tree, considering the stand height, and then take the tape measure with you into the field. Other tools to bring include a handsaw, like a bow saw, which will make a more accurate cut than a chainsaw; gloves, to protect your hands from slivers and sap, both while cutting and carrying your tree out;a broken down cardboard box, to place on the ground to protect your knees while you kneel to cut down the tree; a tarp, to drag the tree out on and to cover your car with during transport; and a rope, to secure the tree to your car.

No. 4:  And these things, too

Santa at Adam’s Acres Tree Farm located in Petersboro, Utah.
Photo courtesy of Adam’s Acres Tree Farm

Warm and waterproof boots and gloves, snowshoes, and a shovel to dig your vehicle out in case you get stuck in the snow. Last November, a family from Grantsville experienced the spirit of Christmas firsthand when a passerby helped dig out their truck after it had been stuck for hours during a Christmas tree-cutting expedition in the Stansbury Mountains. 

There are, of course, other options for cutting your own Christmas tree in Utah that don’t involve permits or venturing into the backcountry. You can choose and cut your own Colorado spruce, Doug fir, Austrian pine or white fir tree at Meldrum Christmas Tree Farm in Layton (2073 W. Gentile Street, utahchristmastreefarm.com), open from early November while the trees last. Or sign up to cut your own Christmas tree over Thanksgiving weekend at the Logan-area Adam’s Acres Tree Farm (77 W. Highway 30, Petersboro). Watch for a signup link on the farm’s Facebook page in early November. Other events at the farm over the weekend include visits from Santa, snowball fights, complimentary hot chocolate, campfires and a holiday gift shop.  


Yoga and Cycling

Yoga and Cycling: Five Poses for Post-Ride Recovery

By Outdoors

I don’t have to look at my watch to know I’ve been on my road bike for almost three hours. It’s not so much that my legs are fatigued, it’s the aches in my shoulders, neck, lower back and even my ankles that’s telling how long I’ve been pushing at the pedals. It’s no wonder, of course. While my quads, knees and calves are in constant motion and being regularly replenished with fresh oxygen, the rest of me is relatively stationary, and just getting stiffer with each mile I crank out. 

Jackie Wheeler from Mountain Yoga Sandy demonstrates the pigeon pose, one of the especially helpful yoga positions to help cyclists recover from and prepare for long rides. Photo credit Gillian Hunter Photography.

Jackie Wheeler, owner of Mountain Yoga Sandy (943 S. 1300 East, Sandy) and avid mountain biker, is all too familiar with the twinges and tightness cycling can cause. “I love cycling, but all that repetitive movement, leaning forward and overworking your hip flexors, quads and hamstrings, can cause some pretty unpleasant discomfort—or even injury—if you don’t do some kind of counter activity off the bike,” Wheeler says. “The benefits that cyclists, and really all athletes, can expect from doing yoga include increased flexibility and strength and gaining better control of the breath.”

Engaging in a regular yoga practice will not only double down on the flexibility and strength benefits offered by the poses outlined below but will offer the bonus of mastering control of your breath—a particularly handy skill when you’re, say, trying to recover quickly in between climbs or want to stay calm through a tough technical section of singletrack trail. And though it might be tempting to engage in more challenging yoga classes on the regular, Wheeler advises that those who cycle three or more times a week take it a bit easier. “I’d recommend gentler classes like a stretch, yin or even restore, versus higher intensity classes like power, vinyasa or flow yoga,” she says. “Most regular cyclists don’t need more intensity and can reap the greater benefits of oxygenating the whole body and active recovery by taking less intense classes.”

5 Yoga Poses For Cyclists

Wheeler says these poses are particularly effective in maintaining cycling-specific muscle flexibility and are great to do anytime but especially immediately following a ride.

Cobra, to relieve neck and lower back stiffness. Lie on your stomach with your arms bent so that your hands are directly under your shoulders and your elbows pointing up. Gently curl your spine upward moving your gaze toward the sky just to the point where it feels good.

Pigeon, to stretch the hip flexors and inner hip. From a low lunge position, with your right leg forward and left leg back, lower your body so that your right shin is parallel, or close to parallel, to the top of your mat. Your left leg should be extended straight behind you with the top of your left foot resting on the mat. Switch sides. A gentler alternative to pigeon is figure four: lie on your back with both knees bent and your feet flat on the ground. Move your left ankle to rest on your right leg just above your knee. Bring your right knee toward your chest. Switch sides.

Downward facing dog, to release your lower back, lengthen your spine and to open your hamstrings. From a tabletop or all-fours position, with your hands and knees shoulder-and hip-width apart, roll onto your toes and lift your hips toward the sky, forming an inverted “V” with your body. Keep your
arms straight but maintain as much bend in your knees as you need.

Supine twist, to stretch your core and open your chest. Lie on your back, bring your knees into your chest and extend your arms straight out from your shoulders like a capital “T.” Gently drop both knees to one side while turning your head in the opposite direction and keeping both shoulders on the floor.

To build and maintain all-important core strength, Wheeler also suggests doing regular planks (holding a high push-up position on your hands and toes) and boat poses (balance on your tailbone with your legs lifted and your arms reaching forward).


Paddleboarding in Utah

SUP Your Way to Fitness

By Adventures, Outdoors

Fish flops through the glassy water surface just out from the nose of my paddleboard. I glide lazily along under a clear, blue sky, watching for another. Eventually, I sit down, secure my paddle and roll off into the cool water. After swimming around for a few minutes, I hoist myself back up on the board and lower down onto my back, letting the warm sun dry my goose-pimply skin.

 If you’ve ever tried standup paddleboarding (SUP, for short), you’re familiar with this delicious summertime scene. Thanks to multiple reservoirs, natural lakes and rivers peppering the state from north to south, Utah has many SUP spots. But what many seasoned paddlers and paddleboard neophytes alike may not know about SUPing is what a fantastic workout it can be.

 “Done correctly, paddleboarding can be one of the best, full-body workouts,” says Trent Hickman, owner and operator of Park City SUP (801.558.9878, parkcitysup.com). Hickman offers SUP lessons and rentals, yoga and Surf-fit SUP classes and guided SUP tours at the Jordanelle Reservoir and Pebble Beach, a sandy beach at the Deer Valley Resort snowmaking ponds, just off the back deck of the Deer Valley Grocery-Café in Park City. Leveling up your SUP session from a leisurely outing to a calorie-torching, strength-building workout is not difficult, Hickman says but does involve tuning in to your movements and giving it a little practice. “Paddleboarding is all about transferring energy from your body to the paddle and into the water,” he says. “And, so, if you can master the paddle stroke, you can work your body from your feet on up.”

Hickman’s tips for achieving a dynamic paddle stroke

A) Place your hands on the paddle farther apart than feels natural. “Think of how you’d hold a shovel,” Hickman says. “The farther apart your hands are, the better leverage you have.” To locate the optimal paddle hand placement, stand in front of a mirror and grasp the paddle handle with your dominant hand, and the shaft with your other. Raise the paddle over your head and lower it vertically until it rests on the top of your head and your arms form 90-degree angles. This is how far apart your hands should be when paddling. To help you remember where to place your non-dominant hand along the paddle shaft, mark the spot with a piece of brightly colored tape.

 B) Keep your arms straight and hinge at the waist to place the paddle blade in the water. Instead of bending your arms back and forth to pull the paddle through the water, straight arms engage the larger muscle groups in your chest, back and core. “Having bendy arms,” Hickman says, “works just your arms which will fatigue much faster than those larger muscle groups.” And then as soon as the paddle blade is submerged, straighten your legs and drive your hips forward, which, in turn, drives the board forward.

 C) Keep the paddle vertical, or perpendicular to the water. This will keep the board moving forward in a straight line and allow you to paddle on one side several times before switching sides. A good way to maintain a vertical paddle is to make sure your hands remain directly over one another. “To get this you’ll have to lean over a bit on the paddle side of the board, which works your balance and taps into your core,” Hickman says.

D) Other tips for achieving an efficient stroke include: maintaining an athletic stance with your hips and knees aimed toward the front or nose of the board; stopping the paddle stroke at your feet; and lifting the paddle out of the water at the end of the stroke by rotating the thumb on the hand grasping the handle (the top hand) toward the sky, which turns the paddle blade parallel to the board and allows for a clean lift out of the water.

Staying Safe on a SUP

Whether you are paddling around a calm pond like Pebble Beach or embarking on an hours- and miles-long paddling tour around the 3,000-acre Jordanelle Reservoir, be sure your board’s leash is in good condition and use it properly; wear a PFD (personal floatation device); stay close to the shore; and consider going early in the morning, when the water is calmer and motorized boat traffic is at a minimum.  

Flatwater Paddleboarding Destinations in Utah

  • Pebble Beach, at the Deer Valley Resort’s snowmaking ponds, Park City, is open daily in the summer, 10 a.m. to 5 p.m. “It’s the best place in Utah to learn and you can paddle a third of a mile on flat water while never being far from shore,” Hickman says.
  • Mirror Lake, Trial Lake, Lake Washington, Smith Morehouse Reservoir and dozens more lakes in the Uinta Mountains. Some require a hike to reach (amplifying your workout!) and the water in most of these high-altitude lakes is very cold.
  • Rock Cliff Natural Area is located on the Jordanelle Reservoir’s eastern arm. This section of the reservoir is a no-wake zone and tends to be much less visited than the reservoir’s popular Hailstone area.
  • For advanced SUPers ready to progress to moving water, the Provo River offers gentler rapids surrounded by stretches of calm water. Hickman notes that a helmet, PFD and leash are mandatory for SUPing on moving water
  • Causey Reservoir, located 15 miles northeast of Ogden, is open to non-motorized watercraft only.

Save the Date

The Park City SUP Festival will be held at the Jordanelle Reservoir on June 22, 2024. This annual event includes SUP demos, races, rentals, food and live music. For details, visit parkcitysup.com


Easy Hikes in Utah

Nine Easy Hikes in Utah Perfect for After Work

By Adventures, Outdoors

Nine low-mileage hikes offer great views, interesting destinations and, most importantly, post-work decompression

Though you may be unfamiliar with the term “wildland-urban interface,” if you live anywhere along the Wasatch Front, you bear daily witness to the unique shoulder-to-shoulder closeness of Utah’s biggest metro area and millions of acres of undeveloped forests, canyons, mountainsides and alpine meadows. What this means, of course, is that rather than having to relegate spending time in nature to the weekends, Utah urbanites can get from desk to walking on dirt in under an hour. As such, we encourage you to take advantage of this unheard-of proximity and spring’s balmy, longer days by ending your workday in a way that undoes the damage done by our technology-driven daily lives like almost nothing else: going for a hike.  


1. Adams Canyon, Layton—3.5 miles, out-and-back

This super-scenic and very popular trail runs along the North Fork of Holmes Creek to the impressive 40-foot-tall Adams Waterfall. The trailhead, with bathrooms and ample parking, is located just east of Layton off Highway 89 on East Side Drive. The route begins with steep switchbacks and plateaus as you work your way into the canyon past the Bonneville Shoreline Trail. Leashed dogs are allowed in Adams Canyon. Climbing or attempting to slide down the waterfall is prohibited. 

2. Jack’s Peak, Salt Lake City Foothills Natural Area—2.8-mile loop

This loop trail begins at the end of Lakeline Drive, just north of Parleys Canyon. Short but steep, and with sweeping valley views throughout (i.e. lots of west-facing exposure), this excellent trail is best hiked in the spring or fall. Mailboxes at the summit memorialize Jack Edwards, a toddler who passed away from leukemia in 1995. On-leash dogs are allowed. 

3. Grandeur Peak (Face) Trailhead, Salt Lake City to Rattlesnake Gulch Trailhead, Millcreek Canyon

This newly completed section of the Bonneville Shoreline Trail runs just under five miles (one way) through the foothills from the Grandeur Peak (Face) Trailhead at the very north end of Wasatch Boulevard to the Rattlesnake Gulch Trailhead in Millcreek Canyon—with a valley viewpoint located conveniently at the halfway point. Options for hiking this trail include walking to and from either trailhead to the overlook platform; hiking the entire section as longer out-and-back; or leaving a second vehicle (or a bike) at one trailhead to shuttle to the other. Note: mountain bikes are allowed on this trial and off-leash dogs are allowed in Millcreek Canyon on odd calendar days only.

4. Neffs Canyon, Olympus Cove, Millcreek—3 miles, out-and-back

This route is popular, especially with dog walkers, for good reason. Ample parking and multiple route length options—all shady—make Neff’s a convenient choice for both a quick, leafy jaunt or an all-day objective. Get there by turning off Wasatch Boulevard at Churchill Junior High onto E. Oakview Drive. Turn left onto Parkview Dr and follow the signs to the Neff’s Canyon Trailhead. Walk past the water tank up the dirt road. Bear left at the top to continue along the canyon trail (the right-side option makes a quick, mile-long loop back to the parking lot) that climbs steadily through the forest. You’re a mile-and-a-half in when you encounter the Mount Olympus Wilderness sign. If time allows, continue another mile along the continually steeper trail until arriving at a gorgeous high meadow flanked with aspen trees and craggy peaks. 

5. Mt. Olympus Trail, Holladay—3 miles, out and back to the stream

Looming large over the eastern Salt Lake Valley is the impressive Mount Olympus. While hiking to its peak is a popular bucket list item for both new and longtime valley residents, knocking out the first third of this route is easily done in two hours, and offers a heart-pumping workout along the way. The trail travels south along switchbacks from the Wasatch Boulevard trailhead and then heads directly up as it approaches an intersection with the Bonneville Shoreline Trail. Keep right until the trail meets the BST again, where you’ll again keep right. The route continues to climb as it turns a corner into Tolcats Canyon. You’ll soon reach the stream, which runs year-round except in the driest years. Leashed dogs are allowed.

6. Heughs Canyon, Holladay—2.5 miles, out-and-back

In the spring and early summer, this steep but lovely hike ends at a gorgeous moss-flocked waterfall. Park in the marked stalls on Wasatch Boulevard just east of the Old Mill Golf Course. Walk half a mile along Oak Canyon Drive and to the end of the private Berghalde Lane to the trail’s start. (Please respect area homeowners by keeping your dog leashed until you’re at least .3 miles up the trail.) Once off the pavement, the 2-mile round trip route climbs steadily along the shaded Heughs Creek. After crossing a second bridge, the trail steepens until arriving at a boulder field. Make the short scramble over the boulders to the base of the waterfall.

7. Ferguson Canyon to Big Cottonwood Canyon, Cottonwood Heights—3 miles, out-and-back

A more rolling route along one of the newest sections of the Bonneville Shoreline Trail is the out-and-back route from Ferguson Canyon to the Dogwood Campground in Big Cottonwood Canyon. Begin at the new Ferguson Park, located just south of Big Cottonwood Canyon on Prospector Drive. Follow signage for a quarter mile up to the trailhead on Quicksilver Drive. Walk up the hill past the water tank onto the well-marked trail that alternatively runs through shady groves and sage-covered hillsides. Bear left at the first fork you encounter (right continues up Ferguson Canyon), crossing a seasonal stream. The trail continues through meadows, along an open hillside overlooking the valley and ends at the Dogwood Campground restrooms. Note: Though dogs are allowed in Ferguson Canyon, they are prohibited on this trail’s Big Cottonwood Canyon section.

8. Bell Canyon Upper Bridge, Sandy—3 miles, out-and-back

Though the full route to Upper Bell Canyon Reservoir is more of a full-day endeavor, hiking from the amenity-heavy Bell Canyon Preservation Trailhead (on the south side of the intersection of Wasatch Boulevard and Little Cottonwood Canyon Road) to the bridge offers a route more appropriate for an evening outing. From the trailhead, keep bearing left at each trail junction you come upon until reaching the bridge. Hungry for more? The canyon’s lower falls are 1 mile farther up the trail, but the route gets significantly steeper and rockier along the way. Before you go: pack a dinner to enjoy at one of the trailhead’s picnic tables with views of the Salt Lake Valley. Dogs are not allowed in Bell Canyon.

9. Rock Canyon Cave, Provo—3 miles, out-and-back

This popular Utah County hiking and rock climbing destination is located directly east of the cupcake-shaped Provo Utah Temple. The route begins as a paved road at the Rock Canyon Trailhead but quickly changes to a shady trail that meanders over five numbered bridges. About a mile and a half up the trail, between bridges #3 and #4 on the north side of the trail, is an old mining cave and an apt turnaround point for an after-work hike. If you have more time, continue on the main trail to a fork right after bridge #5: stay left to continue to Khyv Peak (formerly known as Squaw Peak); the lesser traveled right fork is a very steep route leading to Y Mountain. The 7-mile round trip route to Khyv Peak passes through evergreen stands, a meadow and a campground before becoming steep for the last half mile or so to the summit.

A Trail Tome for Ever Hiker

Ashley Brown wrote Urban Trails: Salt Lake City as a homage to her late grandmother. “My intent behind this book was creating something for every hiker, from the hardcore trail runner to people like my granny, who knew and loved the restorative benefits of getting out into nature,” Brown says. As such, Urban Trails is an apt tool for hikers of all abilities to explore more than 40 routes both within and adjacent to cities lining the Wasatch Front. Pick up your copy at REI, Kings English Book Shop or from mountaineers.org/books.  


Hodges_SpringClimbing

Hit the Boards: How to Prep for Spring Climbing

By Adventures, Outdoors

“The gym makes your body strong but your mind soft” is an adage many seasoned rock climbers know all too well. And it’s no wonder. Even the most mindful climbers let their brains revert to autopilot while spending the winter cruising from one colored plastic hold to another in the climbing gym. But as the first hint of warmth hits the Wasatch in the spring, dusting off those outdoor climbing-critical decision-making and body-awareness skills you’ve let lie dormant all winter long can feel a lot like being a beginner all over again. 

To avoid the dreaded springtime two-steps-back feeling, spend time on the Spray Wall, Tension Board or the Moon Board. So says Natasha Hodges, Climbing School Manager at Momentum Climbing Gym in Millcreek. “People are often intimidated to try the training boards because they are where the really strong climbers tend to hang out,” Hodges says. “But the boards are really useful for all levels of climbers and everyone using them is there for the same reason: to get stronger, both physically and mentally.”

Climbing in Utah
Natasha Hodges climbing in Little Cottonwood Canyon.
Photo by Jon Vickers

All three of the aforementioned walls are bouldering features, or climbing walls that don’t extend more than 15 feet off the ground. A Spray Wall is densely packed with holds of all shapes and sizes; a Tension Board has an adjustable incline and uses sleek wooden holds set in distinct patterns designed to maintain body tension and improve footwork; and the Moon Board is fixed at a 40-degree incline and is made up smaller, oddly shaped holds focused on improving finger strength and power. Both the Moon Board and Tension Board also feature LED-lit holds that offer an endless variety of problems accessed through free apps. Additionally, the Tension Board allows users to flip, or mirror, routes for symmetrical workouts. A few of the drills Hodges utilizes with her students include…

Timed movement: Set a timer for two, three or four minutes with the goal of continuous movement around the Spray Wall for that entire time. Rest for the same amount of time you worked and then repeat the set twice. Mix it up by finding holds where you can comfortably rest for 30 seconds. “Playing around with doing things like dropping a knee or opening up your hips to find a rest position, especially on holds that aren’t so good, will give you awareness of how to use your body to find rests on those long routes outside,” Hodges says.

Four by fours: Climb four routes or problems without resting in between. When all four are completed, rest for the same amount of time you spent climbing the four routes. Instead of running around the gym to find four problems in the same grade, stay at the Tension Board where you can do a problem, mirror it, do it again and then complete the same process with a second problem. “Doing problems back-to-back like that will help give you the power, endurance and confidence to do those hard, tension-heavy moves, typical of outdoor bouldering and climbing, while you’re pumped or fatigued,” Hodges says.

Project mimicking: Because the Spray Wall is packed with so many different types of holds, you’ll likely be able to find, or closely mimic, a move on an outdoor climb you were working on last season. “For example, maybe the outside move you’re working on is a hard gaston off of a crimp with a bad foothold,” Hodges says. “Because there’s so many holds and different options on the Spray Wall, you can replicate moves and continue to get better at a specific outside climb before the season starts.” 

Gear for Getting Outside


Day-hike-through-Bryce_AdobeStock_563376363

How to Enjoy Bryce Canyon in the Off-Season

By Adventures, Outdoors, Travel

Undoubtedly, the alpine skiing opportunities within 30 minutes of Salt Lake rank evenly with the best winter resorts in the world. And I, like hundreds of thousands of Wasatch Front residents, try to soak up as much resort skiing as I can during Utah’s short but sweet ski season. That said, for one winter weekend, I hang up my alpine skis, load my snowshoes and cross-country skis into the car and beat it to Bryce Canyon National Park. There, among red rock spires, campy small towns, scenic trails and glorious cross-country ski tracks, I treat myself to a much-needed, nature-infused recharge.  

Bryce Canyon
Bryce Canyon National Park Rangers lead guided snowshoe excursions along the rim of Bryce Canyon.
Photo Courtesy of Bryce Canyon National Park.

1. Stay

Lodging rates in the Bryce Canyon area are a steal in winter. Ruby’s Inn, located in Bryce Canyon City, offers clean, pleasant and dog-friendly hotel rooms with lots of on-site amenities. In nearby Tropic, Bryce Canyon Pines features standard hotel rooms and a three-bedroom family suite with a full kitchen. Or rent a home through Vrbo or AirBnB (like this cute two-bedroom house 12 miles from BCNP in Cannonville at vrbo.com/719925). rubysinn.com, bcpines.com

2. Glide

Ruby’s Inn sets more than 30 kilometers of cross-country skiing track for both classic and skate skiing throughout the Ponderosa Pine-filled forest directly next to the hotel. Admission to the track is free for both hotel guests and those staying elsewhere. Ruby’s Inn also maintains an ice ribbon next to its Winter Activity Center (Ebenezer’s Bar & Grill building). The cost to skate is just $7 and includes ice skate rental.

3. Hike

Thanks to its 8,000-feet-above-sea-level elevation, the contrast of snow-flocked red rock against blue skies is both a sight to behold and common in the winter months at Bryce Canyon National Park. For an up-close view of Bryce’s snow-frosted spires or “hoodoos,” take a walk on the Queen’s Garden/Navajo Combination Loop, a 2.3-mile, moderate trail descending and ascending the canyon between Sunset and Sunrise points. Before you go, check in at the park Visitor Center for the latest trail conditions and info on ranger-led snowshoe hikes. 

If you’re looking for more than the ample elbow room offered at Bryce Canyon, head 10 miles southeast to Red Canyon, known as “Little Bryce,” for its red rock hoodoos and pink sand. The Red Canyon Visitor Center is closed in the winter, but current hiking, mountain biking and OHV trail information is posted on a kiosk at the mouth of the canyon. Drive 10 miles farther along Scenic Byway 12 through Tropic to Kodachrome State Park. There are five hiking trails that wind among surreal sandstone spires, called sedimentary pipes.

Pro tip:
Dress in layers as temperatures vary widely between the sun and shade in the desert, especially in the winter. Snow-covered trails throughout the park are invariably slick making micro-spikes and hiking poles/walking sticks musts. (Both can be rented at Ruby’s Inn.) nps.gov/brca, stateparks.utah.gov

4. Eat & Drink

Dining in this corner of Utah is limited, especially in the winter. The Cowboy’s Buffet & Steak Room at Ruby’s Inn is open year-round, but there’s often a wait. The region’s only liquor store can be had at Ruby’s Inn as well. Other options include traditional barbecue from the soda fountain IDK Barbecue or hand-tossed pizza, salads, entrees, and beer from The Pizza Place at Bryce Canyon Inn—both in Tropic. Clark’s Country Market, on Main Street in Tropic, offers supermarket-level groceries. Pro tip: I often pre-make chili or curry to heat up in a crock pot in the hotel room while my friends and/or family and I ski or hike during the day. Then we know we’ll have a hot meal at the end of a stellar day spent outdoors. brycecanyonpizza.com, idkbarbecue.com, clarkscountrymarket.com 

Bryce Canyon
Bryce Canyon National Park has been officially designated a Dark Sky Park and the night sky is especially gorgeous in the winter.
Photo Courtesy of Adobe Stock.

Winter Festival 

Snow play in the high desert takes center stage during Ruby’s Inn’s annual Bryce Canyon Winter Festival (February 17-19, 2024). This family-friendly event includes cross-country ski and ice-skating instruction, wildlife track clinics, watercolor painting, yoga classes and much more—most of which are free. Events are held at Ruby’s Inn and in Bryce Canyon National Park. rubysinn.com

Peering into Dark Skies 

Petzl Tikka Headlamp, $34.95, available at rei.com

Though the Bryce Canyon Astronomy Festival is held annually in June, low moisture and long nights make winter an even better time to stargaze at BCNP. It is possible, in fact, to see more than 7,500 stars with the naked eye on a moonless winter night there. Take advantage of regular ranger-led stargazing talks and clinics held as part of one of the oldest national park astronomy programs in the country. Both BCNP and Kodachrome Basin State Park have been named Dark Sky Parks by the International Dark Sky Association. 

Pro tip: If you plan to walk around at night, consider bringing along a headlamp with a red light setting, like Petzl’s Tikka, which allows you to see details in the dark without impairing anyone’s night vision. nps.gov/brca 

Tubing

Sledding in Utah: It’s Not Just For Kids

By Adventures, Outdoors

Most of my sledding memories were formed on the hilly golf course next to my childhood home in Northern Michigan. But after I moved to Utah in my mid-twenties and had kids in my mid-thirties, I found that my hometown sledding terrain pales compared to the sledding opportunities to be had here. Sledding was a part of most winter weekends when my kids were young; a practice that waned as they entered high school. Recently, however, I’ve realized that whooshing down a snowy slope on a plastic sled is not only fun but a fabulous complement to all the other winter sports I like to do, too. 

The leg muscles we use to propel ourselves up to the top of the sledding hill—gluteus maximus and quadriceps—are also the prime movers for skiing and snowboarding. But that’s not all that gets worked on a sledding hill climb, so says Michael Krushinsky, owner and head coach at Wasatch Fitness Academy. “Additionally and at least as valuable, is how it works your body’s responsiveness to changing terrain,” he says, “Slight undulations in the ground, slipping a bit in the snow and slogging through untracked snow, all ask the body to instantly use stabilizing muscles to support the hips, knees and ankles in ways that are beyond the demand of walking uphill on pavement.” Pulling weight behind you, like a young child in a sled, for example, gets your torso, abs and back muscles in on the action, Krushinsky added.

Adult Sledding
PHOTO MELISSA FIELDS
FROM LEFT TO RIGHT: Author Melissa Fields, her sweet pooch Bell (seen here photo bombing), Christine Mikell, Jen Mijangos and Kelly Bollow.

Along with the physical benefits, I’d argue that adult sledding offers a pretty unique mental health boost. Last winter I began joining my neighbor in her before-work sledding sessions, and I found that on the days I sledded, I felt a bit lighter, more settled and generally happier for the remainder of the day. The fresh air and exercise were probably part of the equation, but I also attribute the bump to laughter. Something about flailing uncontrollably down a hillside, trying to avoid trees and other obstacles with snow flying on my face, strikes me as hilarious. Turns out my post-belly-laugh good vibes are not all in my head. According to the Mayo Clinic, laughter enhances oxygen intake, activates and relieves the stress response and soothes tension, leaving the laughter with a greater sense of well-being that can last for hours.

Adult Sledding Hills

As you may have gathered, the physical and mental benefits of adult sledding are mostly about hiking uphill and then using a sled to avoid the knee-wearing walk back down. While sledding hills like Sugar House Park, Donut Falls in Big Cottonwood Canyon, Flat Iron Mesa Park in Sandy and Mountain Dell Golf Course in Parley’s Canyon are home to some of the area’s most popular sledding venues, they are not as ideal for adult sledding. Neff’s Canyon, Millcreek Canyon, Park City’s Round Valley and City Creek Canyon (closed most weekdays until 2027) provide a steady, longish and not-too-steep but still heart-pumping uphill hike followed by an easily navigable descent. 

Just remember to keep an eye out for other trail users, like hikers and skiers, on  your downhill runs and prepare to yield (basically, wreck) to make way for uphill traffic. Happy sledding! 

Sleds that Shred

Zipfy Mini Luge Sled, $54.99, Scheels. This sleek, compact luge-style snowslider is easy to carry uphill and provides a fun, core-challenging ride on the way down. Recommended for tighter, already broken-in sledding zones. scheels.com

Flexible Flyer 48-inch Snow Boat, $28.99, Ace Hardware. This classic sled has a grooved undercarriage for better steering, a cushioned seat to help absorb the bumps and is extra wide to allow for a small passenger. acehardware.com

Adult Sledding

L.L. Bean Polar Slider DLX Sled, $69. This high-quality plastic sled is an upgrade that is fast and light but still steerable. It comes with a durable nylon webbing tow rope, ideal for hauling a small child back up the hill. llbean.com

1_Lights-at-GLOW

Light in the Dark: GLOW at the Gallivan Center

By Arts & Culture

Though we’re well into the darkest and coldest days of the year, downtown Salt Lake features an oasis of light so jam-packed with joy and wonder it’s sure to chase off even your most stubborn midwinter doldrums. GLOW, on display now at the Gallivan Center Plaza (239 S. Main St., SLC), encompasses nine different LED-lit sculptures, commissioned by THE BLOCKS and created by In Theory Art Collective.  

Photo by Bobbi Tolman.

But calling GLOW’s art pieces sculptures doesn’t do this experience justice. Gallivan Plaza has been transformed with luminescent flowers and animals, multidimensional stars that float overhead from the plaza’s pergolas, and a tunnel of offset-lit cubes and a glowing arch that invites passing through and under. Iterations of GLOW have appeared at the Gallivan for the past two winters, but never with as many pieces as are displayed for this year’s installation. “THE BLOCKS gave us carte blanche to create what we wanted, and the vision became to not just have one or two pieces but to draw people through the space in a celebratory and inspirational way,” says Emily Nicolosi, In Theory Art Collective director and artist.

Emily and Ian Nicolosi (and their baby). Emily is the lead artist and director of In Theory Art Collective and Ian is a contributing artist to the collective. Photo by Bobbi Tolman

A theme central to this year’s GLOW is celebrating Utah’s diverse natural, cultural and social landscapes “in an inherently positive way, full of joy and love,” says Nicolosi. “And we wanted at least one of the installations to be created in collaboration with a Native American artist or group of artists.” And so In Theory invited author Laura Tohe (lauratohe.com), a Navajo Nation Poet Laureate, to write a short poem inspired by GLOW’s place-specific theme. The result is “You belong to the earth,” a beautifully optimistic and comforting elegy that In Theory republished in scripty neon text as part of GLOW. “The inspiration,” Tohe explained, “was to remind us that we are all a part of this planet we call Nahasdzáán, Mother Earth. She sustains us, human and non-human, animate and non-animate, by providing us with everything we need to exist. We don’t have another place to live. More so during global warming, I hope that we take more seriously our responsibility to care for the earth and in doing so, we take care of ourselves. I want my children and grandchildren to live in a world that has a healthy heart.”

Other GLOW pieces include Columbine Clusters, illuminated interpretations of one of Utah’s most defining native wildflowers, and Fauna Illuminata, clear acrylic, LED-lit animal sculptures created on a 3-D printer depicting Utah’s endangered species—both of which are interspersed among Gallivan Plaza’s evergreen “forest.” Treehive is a collection of neon hexagons in varying sizes, created originally for THE BLOCKS Open Streets initiative, revived for GLOW to call attention to the threatened Western bumble bee. And those who’ve visited the Gallivan Center in the past will remember Miri the Star, a multidimensional, lit snowflake sculpture, and koro loko, an on-point heart Nicolosi made originally to display at the 2019 Burning Man Festival and that seeded creation of In Theory Art Collective.

Even in daylight, GLOW’s dichroic sculptures liven up the winter landscape. Photo by Bobbi Tolman.

Nicolosi invites you to enter GLOW from the Gallivan Plaza’s Main Street entrance when you go. You’ll be greeted by Polychroma, a 16-foot-tall, steel-framed arch lit with LED lighting that graduates from black and white to the colors of the rainbow. “This piece acknowledges Utah’s LGBTQ+ community and is a metaphor for the fact that diversity is a beautiful thing,” Nicolosi says.

GLOW is on display at the Gallivan Center through the end of February. Admission is free and open to the public.  


XC-Skier_135902026

How Nordic Skiers Prep for Cross-Country Skiing

By Outdoors

Veteran cross-country skiers know, making skate or classic laps along an expertly groomed track can be one of winter’s greatest pleasures. It’s a fantastic workout, a great way to get out into nature during the winter and—no offense to Utah’s mountain resorts—much easier on your wallet than alpine skiing. Think you might be interested in giving this all-ages sport a go? Following are a few ways both newbies and experienced Nordic skiers can prep for the coming skinny-skiing season.

Getting Fit

“In cross-country skiing, and almost every other sport, the core is super important,” says Laurie Humbert, a member of the 1994 U.S. Biathlon team, Nordic ski coach and co-lead of The Utah Nordic Alliance’s (TUNA) adult dryland training sessions. “The action of all the distal muscles (muscles in your limbs) originate from your core.” And by core, Humbert is talking about more than your abs. “The core runs from the bottom of your neck to your hips, front and back.” 

Specific exercises Humbert recommends to strengthen your midsection include…

Planks—sustaining the top of a
pushup position. Try adding leg circles and doing side planks as well.

Pilates 100s—lifting your shoulders
and legs off the ground while
moving your arms up and down
with your breath.

Super-mans—lifting and holding
your arms and legs off the ground
from a prone position.

Bridge poses—using your feet to
lift your lower body off the ground
while lying on your back.

Though cross-country skiing is a practice in simultaneous arm-and-leg action, most of the activity’s power comes from the legs. Get your lower half in ski-shape by doing…

Lunges and walking lunges—
to both strengthen the quads and open the hip flexors.

Lateral exercises—like side lunges
and side shuffles.

Ski bounding—energetic, continuous leaping up a grassy hill, with or without ski poles.

In addition to leading fall dryland sessions, Humbert stays fit throughout the winter by leading weekly on-snow workouts at Mountain Dell. Visit utahnordic.org for details and to register.

Northern Utah Nordic Centers

  • Big Mountain Pass Road (S.R. 65), Parley’s Canyon, 5 km groomed two to here times per week by TUNA, free admission, no dogs, utahnordic.org/sr-65.
  • Jeremy Ranch Nordic Center, Park City, rentals and private lessons, day pass required, no dogs, thejeremy.com/nordic.
  • Mountain Dell, Parley’s Canyon, 10 km groomed daily by TUNA, pay for a day pass at the fee post or via Venmo or Paypal, no dogs, utahnordic.org.
  • North Fork Park, Weber County, 20 to 30 km of grooming for classic and skate skiing, snowshoeing and fat biking by Ogden Nordic, lessons, day pas required, leashed dogs allowed, ogdennordic.com.
  • Round Valley, Park City, 25 km of multiuse track, open to skiers, snowbikes, hikers, and off-leash dogs, free admission, mountaintrails.org.
  • Solitude Mountain Resort Nordic Center, 20 km groomed track, lessons, rentals, full-day or half-day pass required, no dogs, solitudemountain.com.
  • Soldier Hollow Nordic Center, Midway, 30 km groomed track, lessons, rentals, biathlon programs, no dogs, utaholympiclegacy.org.
  • Spruces Campground, in Big Cottonwood Canyon, 5 km track groomed several times per week by the U.S. Forest Service, free admission, no dogs.
  • Sundance Resort Nordic Center, Provo Canyon, 15 km of grooming, rentals and lessons, full-day or half-day pass required, no dogs, sundanceresort.com.
  • White Pine Touring Nordic Center, Park City, more than 15 km of groomed loops, rentals, lessons, kid-trailer rentals, full day or after-3 p.m. pass required, no dogs, whitepinetouring.com  

Gearing Up

Functional, cool-looking gear and duds for hitting the track.

Leki PRC 650 ski poles. These sturdy-but-light carbon poles feature The Nordic Shark, a grip/strap system with quick-release pole straps allowing quick detachment from your poles to answer a phone call, pick up after your dog, or high-five your buddy after climbing a slope.

 Smith Bobcat sunglasses. Google-like coverage with the airflow and light weight of sunglasses is what you’ll get with these stylish shades. Each pair comes with a dark lens for bluebird days and a clear one for when it’s not so sunny.

Swix Dynamic pants. Since cross-country skiing is such a cardiovascular-heavy sport, breathability is key in clothing. These pants have breathable, wind-proof and water-resistant front panels; comfortable, multi-directional stretch; and zippered leg openings, making them easy to get in and out of.